- Master Arif
- +44(0)7790029002
- [email protected]
How To Password Protect USB Drives In Windows 10

How to give a domain user local admin rights?
June 19, 2019
How to logoff remote desktop sessions via command line tools?
August 6, 2019How To Password Protect USB Drives In Windows 10
A lot of us often carry crucial data on USB flash drives. Many of us even use USB flash drives to backup important data. If you also carry data on USB or backup PC’s data to USB flash drives, it’s a good idea to password protect your USB drives to protect your data if you ever lose your USB drives.
There are many software around to lock data on your USB drive with a password. Most of the USB flash drive manufacturers include their own software to password protect USB drives. For instance, there is an official software to password protect SanDisk USB flash drives. Likewise, you can password protect Western Digital external drives using WD Security software.
The thing is that most of us format the USB drive or simply delete all the software on the USB drive before start using it. In addition to official software, there are tens of third-party software available to password protect data on your USB drive. But why use a third-party software when there is a built-in feature in Windows 10 to password protect your USB flash and hard drives?
If you are on Pro or Enterprise edition of Windows 10, you can use the built-in BitLocker To Go to password protect your USB flash drive with ease.
What is BitLocker To Go?
BitLocker To Go is an encryption feature for removable drives, including USB flash drives, SD cards, and external hard disk drives.
BitLocker To Go supports NTFS, FAT, FAT32 and exFAT file systems, meaning a USB drive formatted with any one of these file systems can be protected using BitLocker To Go.
Protect your USB drive with a password using BitLocker
Password protecting a USB flash drive or external USB hard drive with BitLocker is easy. Simply follow the given directions to password protect your USB drive using BitLocker on Windows 10.
Step 1: Connect your USB flash or hard drive to your Windows 10 PC running Pro or Enterprise edition.
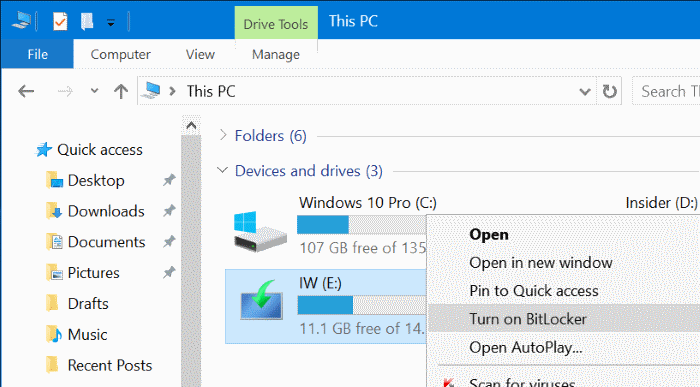
Step 2: Navigate to This PC. There, right-click on the USB drive and then click Turn on BitLocker option.
Step 3: Select Use a password to unlock the drive checkbox, enter a password to protect your data on the USB drive, reenter the password to verify the password, and then click Next button.
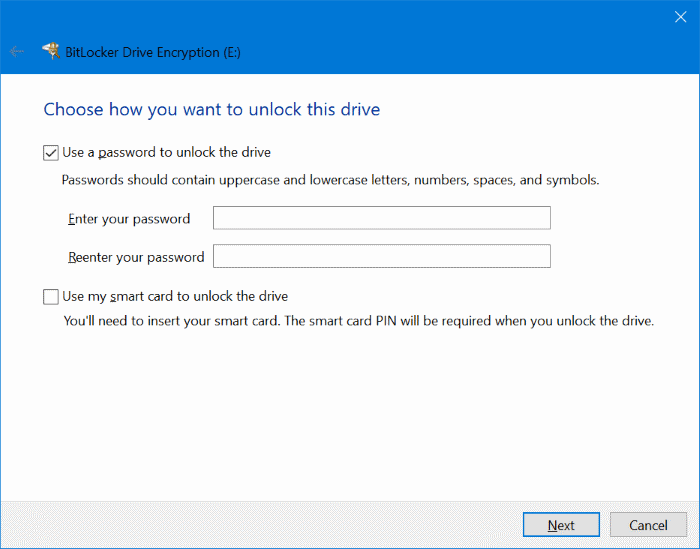
To make your password strong, use at least one uppercase letter, number, lower case letter, and symbol.
Step 4: In this step, BitLocker offers you three ways to back up the recovery key, just in case you forget the password. You can either save the key to your Microsoft account (if you are using one to sign in), save to a file, or print the recovery key and keep it in a safe place.
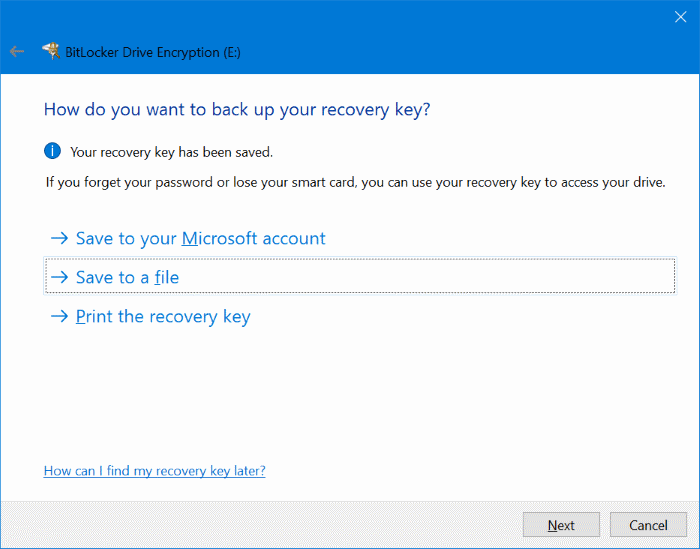
Click any one of these options to back up the key.
Click Next button.
Step 5: Next you will see Choose how much of your USB drive to encrypt screen with two options:
# Encrypt used disk space (faster and best for new PCs and drives)
# Encrypt entire drive (slower but best for PCs and drives already in use)
We recommend you select Encrypt entire drive option.
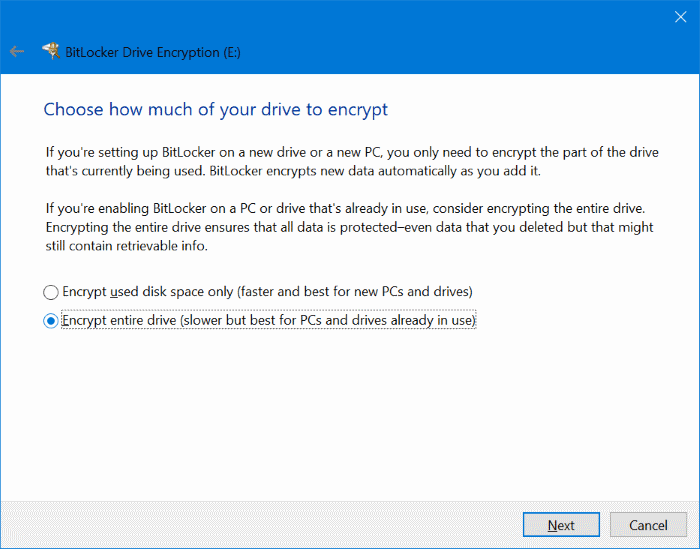
Click Next button.
Step 6: Finally, you need to choose which encryption mode to use. You can choose any method you wish, but we suggest you select Compatible mode (best for drives that can be moved from this device).
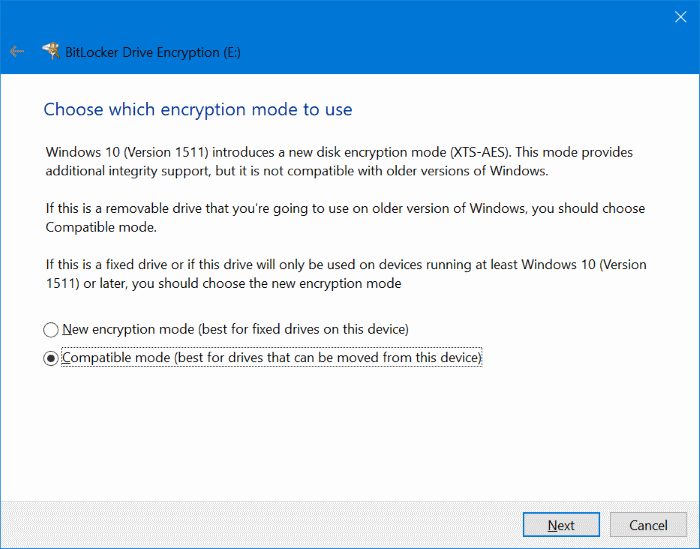
Click Next button.
Step 7: Click Start encrypting button to begin encrypting your drive. This might take a few minutes to hours depending on what you have chosen in Step 5.
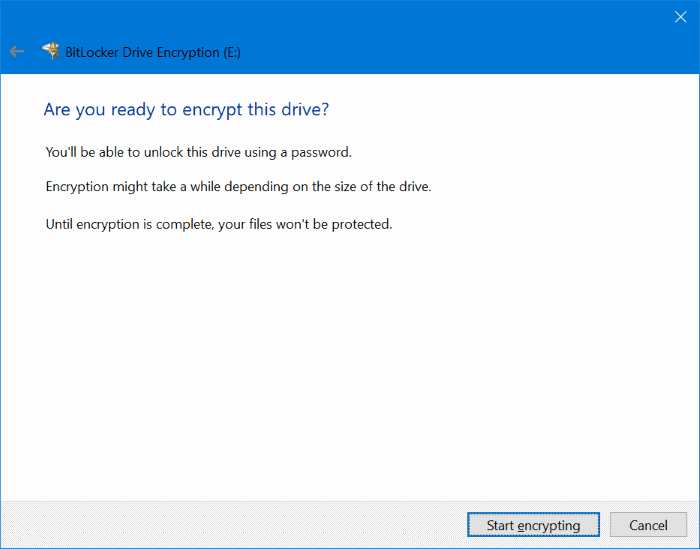
You can use your PC and continue during this process. Once the encryption is done, you will see “Encryption of X is complete” message. You may now disconnect the drive.
Accessing the password protected USB drive
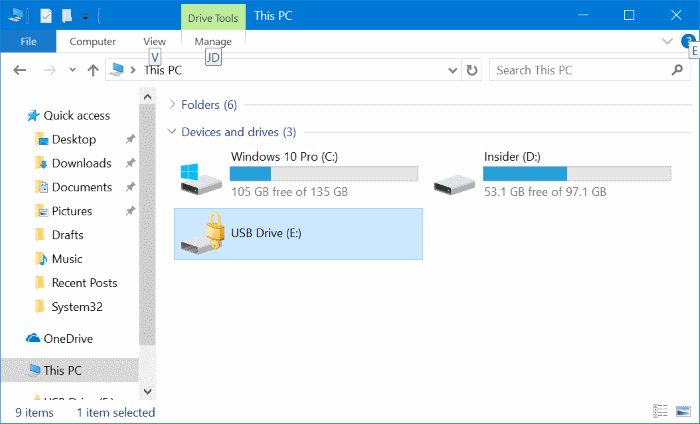
Step 1: Open up This PC to see your USB drive.
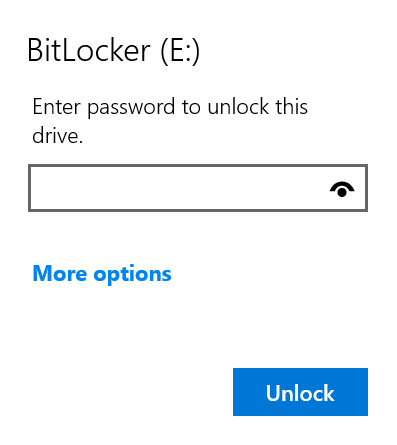
Step 2: Double-click on the USB drive icon. You should now see a prompt asking you to enter the password. Type in the password and then click the Unlock button to access the data on your USB drive.

Turn off BitLocker and remove USB drive password
To remove the password and make the USB drive normal again, you need to turn off the BitLocker for the USB drive. Here is how to do just that.
Step 1: Connect your USB drive to PC and unlock the drive by double-clicking on the USB drive in This PC and then entering the password.
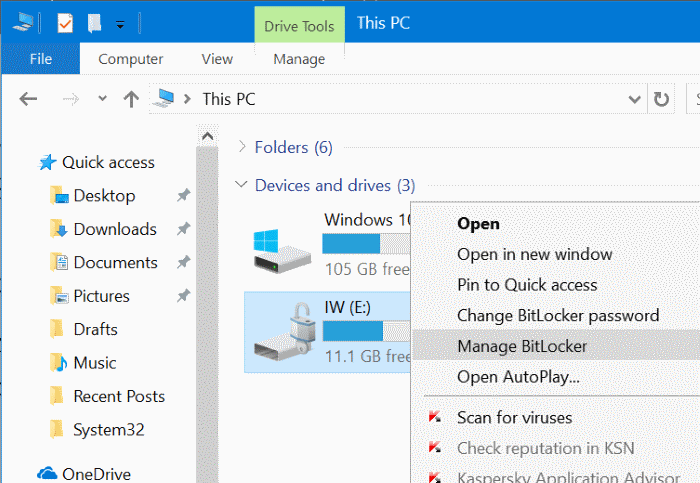
Step 2: Now, right-click on the USB drive, and click Manage BitLocker option. This action will BitLocker Drive Encryption window.
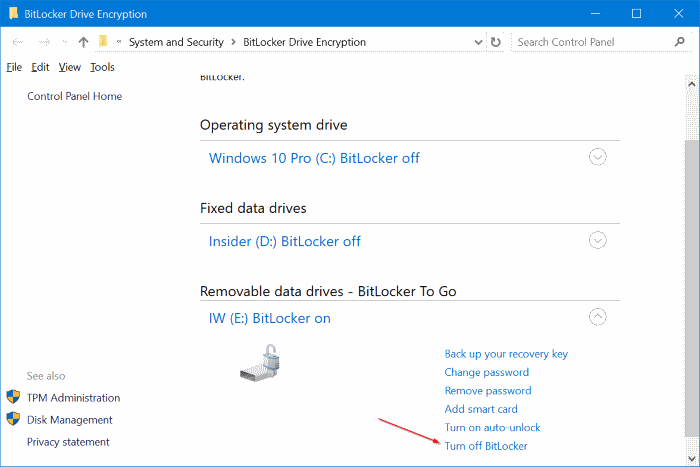
Step 3: Here, in Removable data drives – BitLocker To Go section, click Turn off BitLocker link.
Step 4: When you see the Confirmation dialog, click Turn off BitLocker button to begin decrypting your USB drive.
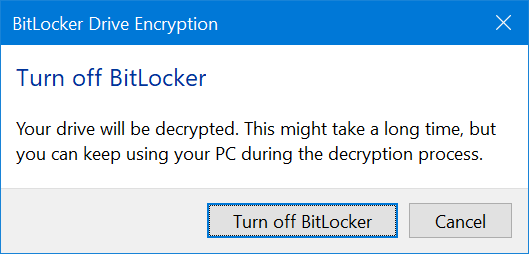
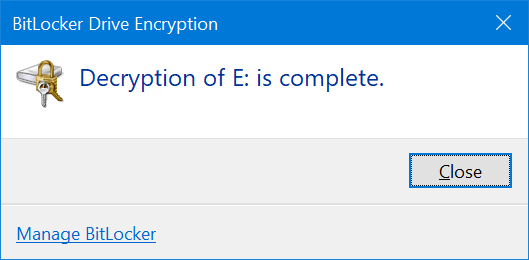
Once decrypting your drive is over, you will see “Decrypting of X: is complete” message. That’s all!


